For 2026, California didn’t shrink what you can build — it tightened the clock on cities and closed a few loopholes that let jurisdictions stall. The biggest changes take effect January 1, 2026: faster permit deadlines with “deemed approved” teeth (SB 543), a relaxed owner-occupancy rule for junior ADUs (AB 1154), faster coastal-zone ADU approvals (AB 462), and stronger state enforcement against cities that drag their feet (SB 9). The core sizing and setback rules you already know are unchanged. For an Orange County homeowner, the headline is timing and leverage — not a new size limit.
What did NOT change in 2026 (the foundation)
Before the new headlines, know that the rules most homeowners care about are stable. Per the California Department of Housing and Community Development (HCD ADU page and its ADU Handbook, updated with a 2026 addendum):
- Size. Your city cannot set a maximum that prevents at least an 800-square-foot ADU. In practice cities can’t cap below 850 sq ft for a one-bedroom or 1,000 sq ft for two-plus bedrooms, and detached ADUs up to about 1,200 sq ft are broadly permitted.
- Setbacks. A 4-foot side and rear setback must be allowed. Cities can’t force more on a conforming ADU.
- JADUs. A junior ADU is 500 sq ft or less, carved out of the walls of an existing single-family home.
- Garage conversions. When you convert a garage to an ADU, the city cannot require you to replace the lost parking. This is a big deal on tight OC lots.
- Owner-occupancy for the ADU. Cities cannot impose an owner-occupancy requirement on a standard ADU — you can build one and rent both the house and the ADU.
- Ministerial approval. A code-compliant ADU is approved by-right (ministerially) — no discretionary hearing, no neighbor veto.
If you want the full walk-through of these baseline rules, see our ADU Guide.
01SB 543 — the permit clock now bites
This is the change with the most day-to-day impact. Effective January 1, 2026, SB 543 forces a tighter, enforceable timeline:
- The city must determine whether your application is complete within 15 days. Miss that, and it’s deemed complete automatically.
- Once complete, the city must approve or deny within 60 days. Miss that, and the ADU can be deemed approved.
- It clarifies that “square footage” means interior livable space, and exempts ADUs and JADUs under 500 sq ft from school impact fees statewide.
(Sources: Holland & Knight; bill text via the California Legislature.)
In my experience, the 60-day rule already existed for ADUs and was honored unevenly across OC. What’s new is the 15-day completeness deadline plus the appeal right — it removes the favorite stall tactic of “your application is incomplete, resubmit.” Cities can now only re-review the specific items they flagged the first time. That said, “deemed approved” is a legal backstop, not a button you press; you still want a clean, complete submittal so you never have to invoke it. Confirm how your specific city is implementing the timeline.
02AB 1154 — junior ADU owner-occupancy gets easier
AB 1154 narrows the old rule that forced owner-occupancy on every JADU. Effective January 1, 2026, owner-occupancy is only required when the JADU shares sanitation (bathroom) facilities with the main house. Give the JADU its own bathroom and the owner-occupancy mandate generally drops away. The flip side: AB 1154 also bars JADUs from being used as short-term rentals — any rental must be longer than 30 days (Holland & Knight).
For OC homeowners thinking about a JADU as a long-term rental rather than a guest suite, this is the rule to design around early — the bathroom decision now has legal consequences.
03AB 462 — coastal ADUs move faster
A large slice of Orange County sits in the Coastal Zone — Newport Beach, Huntington Beach, Laguna Beach, Dana Point, San Clemente, Seal Beach. Historically, the coastal development permit layer made ADUs there slow and uncertain. AB 462 sets a 60-day approve-or-deny window for ADU coastal permits in jurisdictions with a certified Local Coastal Program, running concurrently with the ministerial review, with deemed approval if the city misses it. If you’re near the water, this is the one to raise with your designer up front — coastal lots still carry extra scrutiny, so plan for it.
04SB 9 — the state can now void a foot-dragging city’s ordinance
SB 9 (2025) gives HCD real enforcement power: a local ADU ordinance that isn’t properly submitted (or resubmitted after HCD flags problems) is null and void as a matter of law, and the city must follow state standards until it fixes its ordinance. HCD can also refer non-compliant cities to the Attorney General. You won’t cite this at the permit counter often — but it’s why state ADU law increasingly overrides a restrictive local rule.
The Orange County reality: state law sets the floor, the city runs plan-check
Here’s the part homeowners underestimate. State law is the floor — but every OC city still runs its own plan-check, applies its own fee schedule, and interprets the rules through its own staff. The same 1,200 sq ft detached ADU moves differently in Santa Ana than in Irvine or Costa Mesa.
What we see on real OC projects:
- Fees and school-impact rules vary — the under-500-sq-ft school-fee exemption helps, but city/utility fees still differ widely.
- Pre-approved (standard) ADU plans are now offered by most cities (statewide push), which can shorten review when a design qualifies.
- Utilities are the hidden timeline — panel upgrades, sewer lateral capacity, and water meter sizing routinely drive schedule more than the city’s review clock.
For a city-by-city breakdown of submittals, fees, and inspections, read our Orange County ADU permit requirements guide. And because cities update interpretations mid-year, always confirm your specific city’s current rules with their planning counter or HCD before you commit a design.
Bottom line
2026 is a homeowner-favorable year: faster mandated timelines, fewer JADU strings, easier coastal approvals, and a state agency willing to overrule obstructionist cities. None of it changes the size or setback math you’ve been planning around. The smart move is to use the tighter clock to your advantage with a complete, code-clean submittal from day one. If you want a straight read on what your specific lot and city allow, contact us or call (949) 374-7980 — we’ll tell you honestly whether it pencils.
Essential Construction Terms Every Homeowner Should Know
Planning a home renovation can feel overwhelming, especially when contractors start using industry terminology that sounds like a foreign language. Whether you’re updating your kitchen, adding a new bathroom, or tackling a whole-home remodel, understanding key construction terms will help you communicate effectively with your team and make informed decisions about your project.
At L Square Construction, we believe an informed homeowner is an empowered homeowner. This guide breaks down 15 essential construction terms you’ll encounter during your renovation journey.
Why Understanding Construction Terminology Matters
When you speak the same language as your construction team, you’ll:
- Communicate your vision more clearly
- Understand project timelines and processes
- Ask better questions during consultations
- Spot potential issues before they become problems
- Feel confident reviewing contracts and proposals
Let’s dive into the terms you need to know.
Planning & Management Terms
General Contractor
A general contractor (often abbreviated as GC) is the professional who oversees your entire renovation project from start to finish. They coordinate all aspects of construction, manage subcontractors, order materials, obtain permits, and ensure work meets building codes and your specifications.
What this means for you: Your general contractor is your main point of contact throughout the project. They’re responsible for keeping everything on schedule and on budget.

Subcontractor (Subtrades)
Subcontractors or subtrades are specialized tradespeople hired by your general contractor to perform specific tasks. Common subcontractors include electricians, plumbers, HVAC technicians, drywallers, and tile setters.
What this means for you: While your GC manages these professionals, it’s helpful to know that different experts handle different aspects of your project. Quality subtrades are essential to a successful renovation.
Scope of Work
The scope of work is a detailed document that outlines exactly what will be done during your project. It includes specifications, materials, timelines, and deliverables—essentially everything covered by your contract.
What this means for you: Review this document carefully before signing. Any work not listed in the scope of work may result in additional charges. This is your protection against misunderstandings.
Change Order
A change order is a written agreement to modify the original scope of work. This might include adding new features, upgrading materials, or addressing unexpected issues discovered during construction.
What this means for you: Change orders affect both your budget and timeline. Always get change orders in writing with updated costs before work proceeds.
Structural & Technical Terms
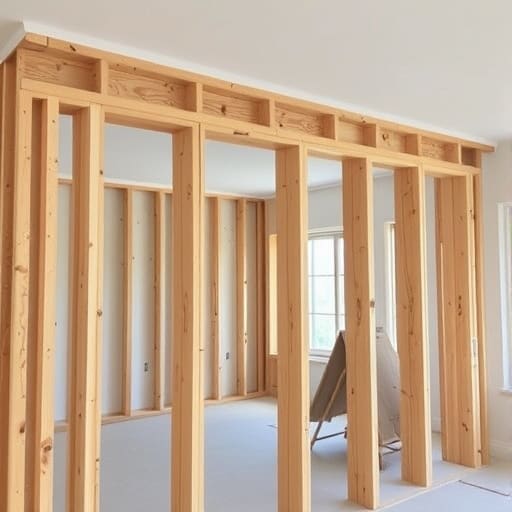
Framing
Framing refers to the skeleton of your home—the wooden or metal structure that forms walls, floors, and roof systems. During renovations, framing work might involve building new walls, opening up spaces, or reinforcing existing structures.
What this means for you: Framing is typically one of the first major steps after demolition. Once framing is complete, you’ll see the new layout of your space take shape.
Load-Bearing Wall
A load-bearing wall is a structural wall that supports weight from above—such as the roof or upper floors. Removing or modifying these walls requires special engineering considerations and reinforcement.
What this means for you: Never remove a wall without consulting a professional. Load-bearing walls require proper support systems (like beams) to maintain your home’s structural integrity. Removing one without proper precautions can cause serious damage.
Coring
Coring is the process of drilling cylindrical holes through concrete, brick, or stone. In home renovations, coring is commonly used to create openings for plumbing pipes, electrical conduits, HVAC vents, or to install new windows and doors in masonry walls.
What this means for you: If you’re adding new utilities or creating openings in concrete foundations or brick walls, coring will likely be part of your project. It’s a specialized task that requires professional equipment.
Rough-In
Rough-in refers to the installation of basic utility systems—plumbing pipes, electrical wiring, and HVAC ducts—before walls are closed up. This work happens after framing but before drywall installation.
What this means for you: Inspections typically occur after rough-in work. This is your last chance to request changes to outlet locations, lighting positions, or plumbing fixtures before walls are sealed.
Finishing Terms
Drywaller
A drywaller is a specialized tradesperson who installs, tapes, and finishes drywall (also called sheetrock or gypsum board) to create smooth interior walls and ceilings.
What this means for you: Quality drywall work is essential for professional-looking finished walls. The drywaller’s skill directly affects how well your paint looks and how seamless your walls appear.
Finishing Work
Finishing work or finishes refers to all the final touches that complete your renovation: paint, trim, hardware, light fixtures, tile, flooring, and cabinetry. These are the visible elements you’ll interact with daily.
What this means for you: This is the exciting phase where your vision comes to life. Finishing work typically happens in the final weeks of your project.
Administrative & Financial Terms
Building Permit
A building permit is official approval from your local government to proceed with construction. Permits ensure work meets safety codes, zoning requirements, and structural standards.
What this means for you: Most renovations require permits. Your contractor typically handles applications, but permit costs are usually part of your project budget. Never skip permits—unpermitted work can cause problems when selling your home.
Building Inspector
A building inspector is a government official who reviews construction work at various stages to ensure it complies with local building codes and safety standards.
What this means for you: Inspections are normal and necessary. Your contractor will schedule inspections at key milestones (after framing, rough-in, etc.). Failed inspections mean correcting issues before proceeding.
Draw Schedule
A draw schedule is a payment plan that breaks your total project cost into installments tied to specific completion milestones. Common draws occur at project start, after framing, after rough-in, and upon final completion.
What this means for you: Draw schedules protect both you and your contractor. You pay as work progresses, and contractors have steady cash flow for materials and labor. Never pay the full amount upfront.
Contingency Fund
A contingency fund is extra money (typically 10-20% of your budget) set aside for unexpected costs. Renovations often reveal hidden issues like water damage, outdated wiring, or structural problems.
What this means for you: Always include a contingency in your budget. It’s better to have funds available and not need them than to halt your project due to unexpected expenses.
Punch List
A punch list is a final checklist of small items that need completion or correction before your project is officially finished. This might include touch-up paint, adjusting a door, or fixing a loose fixture.
What this means for you: Walk through your completed project with your contractor to create the punch list. Don’t make your final payment until all punch list items are completed to your satisfaction.
Ready to Start Your Renovation?
Understanding these essential construction terms puts you in a stronger position to manage your home renovation successfully. You’ll communicate more effectively with your team, make better decisions, and feel confident throughout the process.
At L Square Construction, we’re committed to transparent communication and client education. Whether you’re planning a minor update or a major transformation, we’ll guide you through every step with clear explanations and expert craftsmanship.
Ready to discuss your project? Contact L Square Construction today for a consultation, and let’s turn your vision into reality.
Frequently Asked Questions
Do I need to know all these terms before starting my renovation?
Not necessarily, but familiarizing yourself with common construction terminology helps you understand proposals, ask relevant questions, and communicate effectively with your contractor.
What should I do if my contractor uses a term I don’t understand?
Always ask for clarification. Reputable contractors appreciate informed clients and will happily explain any terminology or processes.
How can I ensure I’m getting quality work from subcontractors?
Ask your general contractor about their vetting process for subtrades. At LS Contractor, we only work with licensed, insured professionals with proven track records.
What happens if I want to make changes after the project starts?
Any changes require a written change order with updated pricing and timeline impacts. Discuss potential changes with your contractor as early as possible.
Related Reading:
- How to Choose the Right General Contractor
- Understanding Your Renovation Budget
- The Complete Home Renovation Timeline
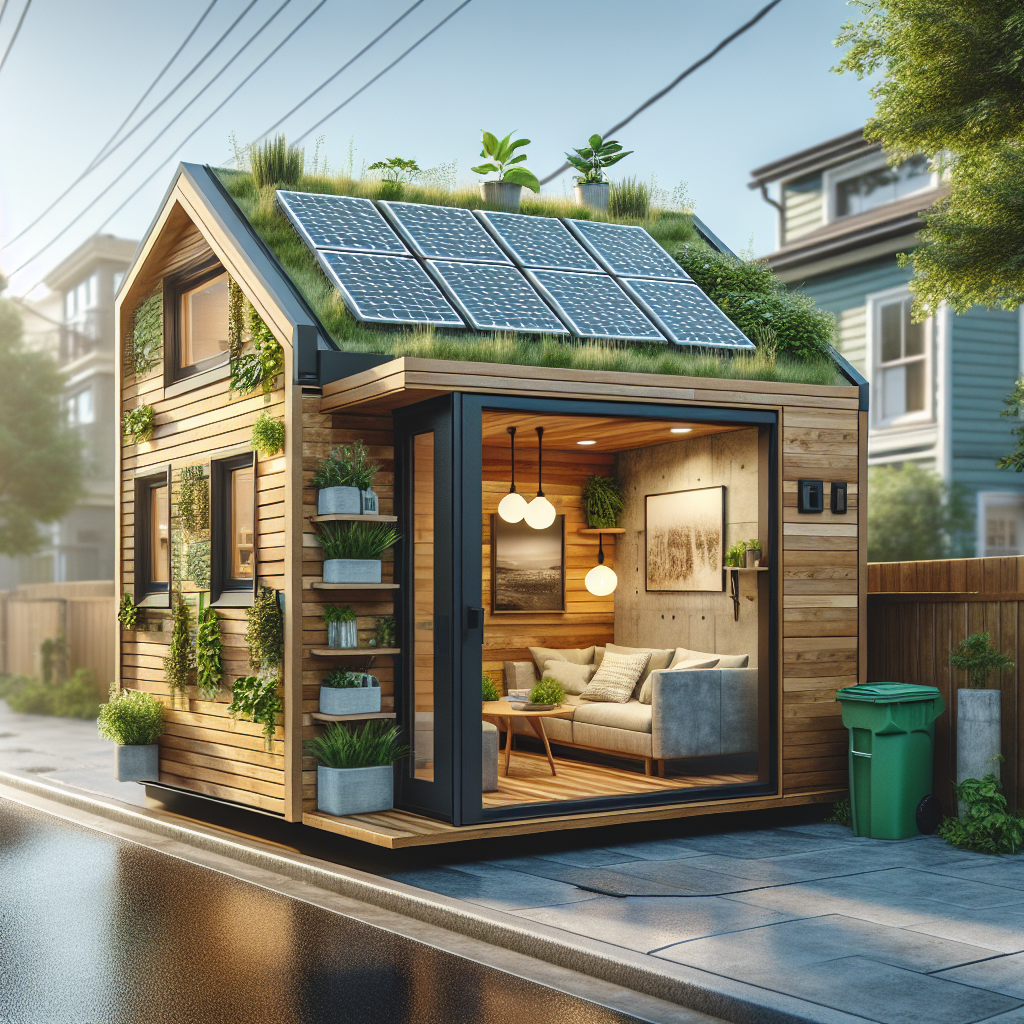
Ready to build the largest allowable ADU in Orange County? A 1200 sq ft ADU Orange County offers maximum living space, highest rental income potential, and best return on investment. Here’s everything you need to know.
Planning note: A 1200 sq ft ADU works best when the bedroom mix, storage, privacy, utility load, site access, setbacks, finish allowances, and rental or family-use goals are resolved before drawings are finalized. Review the Orange County ADU cost guide, Orange County permit guide, custom ADU planning page, and design-build process before choosing a final layout. For official context, compare state guidance from the California HCD ADU Handbook with local notes such as the Orange County Public Works ADU handout.
Quick Answer: Why Choose a 1200 Sq Ft ADU in Orange County?
A 1200 sq ft ADU Orange County is the maximum size allowed by California law, offering:
- Maximum rental income: $2,500-$4,000/month potential
- Lowest cost per sq ft: Better value than smaller ADUs
- Maximum property value increase: $200,000-$400,000
- Complete independent living: 2-4 bedrooms, 2+ bathrooms
- Flexible family use: Multi-generational living space
What Is a 1200 Sq Ft ADU Orange County?
Definition and Legal Framework
A 1200 sq ft ADU Orange County is the largest accessory dwelling unit permitted under California state law. This size represents the maximum allowable floor area for detached ADUs across all Orange County cities, including:
- Anaheim – 1200 sq ft maximum detached ADU
- Irvine – 1200 sq ft maximum detached ADU
- Santa Ana – 1200 sq ft maximum detached ADU
- Newport Beach – 1200 sq ft maximum detached ADU
- Costa Mesa – 1200 sq ft maximum detached ADU
- Huntington Beach – 1200 sq ft maximum detached ADU
Key Legal Requirements for 1200 Sq Ft ADU Orange County
Size Regulations
- Maximum size: 1200 square feet (detached ADU)
- Height limit: 16-20 feet (depending on location and proximity to transit)
- Setback requirements: Varies by city (typically 4-10 feet)
Zoning Compliance
- Allowed zones: All residential zones in Orange County
- Lot eligibility: Single-family and multi-family properties
- Owner occupancy: Not required (as of 2025)
1200 Sq Ft ADU Orange County Cost Breakdown (2025)
Total Investment Range
Complete 1200 sq ft ADU Orange County cost: $350,000 – $550,000. Qualifying builds may price from $280/sq ft, but final pricing depends on site access, utilities, engineering, finish allowances, jurisdiction requirements, and plan-check comments.
Detailed Cost Analysis
| Cost Component | Range | Details |
| Construction | $300,000 – $420,000 | $250-$350/sq ft |
| Permits & Fees | $8,000 – $25,000 | City-specific variations |
| Design & Plans | $15,000 – $35,000 | Architecture & engineering |
| Site Preparation | $5,000 – $20,000 | Utilities, grading |
| Contingency (10%) | $32,800 – $50,000 | Unexpected expenses |
Cost Per Square Foot Benefits
Why 1200 sq ft ADUs cost less per square foot:
- Infrastructure costs spread: Utilities, foundation costs distributed over more space
- Kitchen/bathroom efficiency: Same core expensive elements serve larger space
- Construction economies: Bulk material purchases, labor efficiency
- Permit cost advantage: Similar permit fees for much more living space
Size Comparison: Cost Per Sq Ft
- 400 sq ft ADU: $400-$500 per sq ft
- 800 sq ft ADU: $325-$425 per sq ft
- 1200 sq ft ADU: $250-$350 per sq ft ⭐ Best Value
1200 Sq Ft ADU Orange County Design Options
Layout #1: Luxury 2-Bedroom, 2-Bath Design
Primary Suite Features
- Master bedroom: 180 sq ft with walk-in closet
- En-suite bathroom: Double vanity, separate shower/tub
- Private access: Sliding doors to outdoor patio
Secondary Suite
- Guest bedroom: 150 sq ft with built-in storage
- Full bathroom: Accessible from bedroom and common areas
- Flexible use: Home office, rental room, or family space
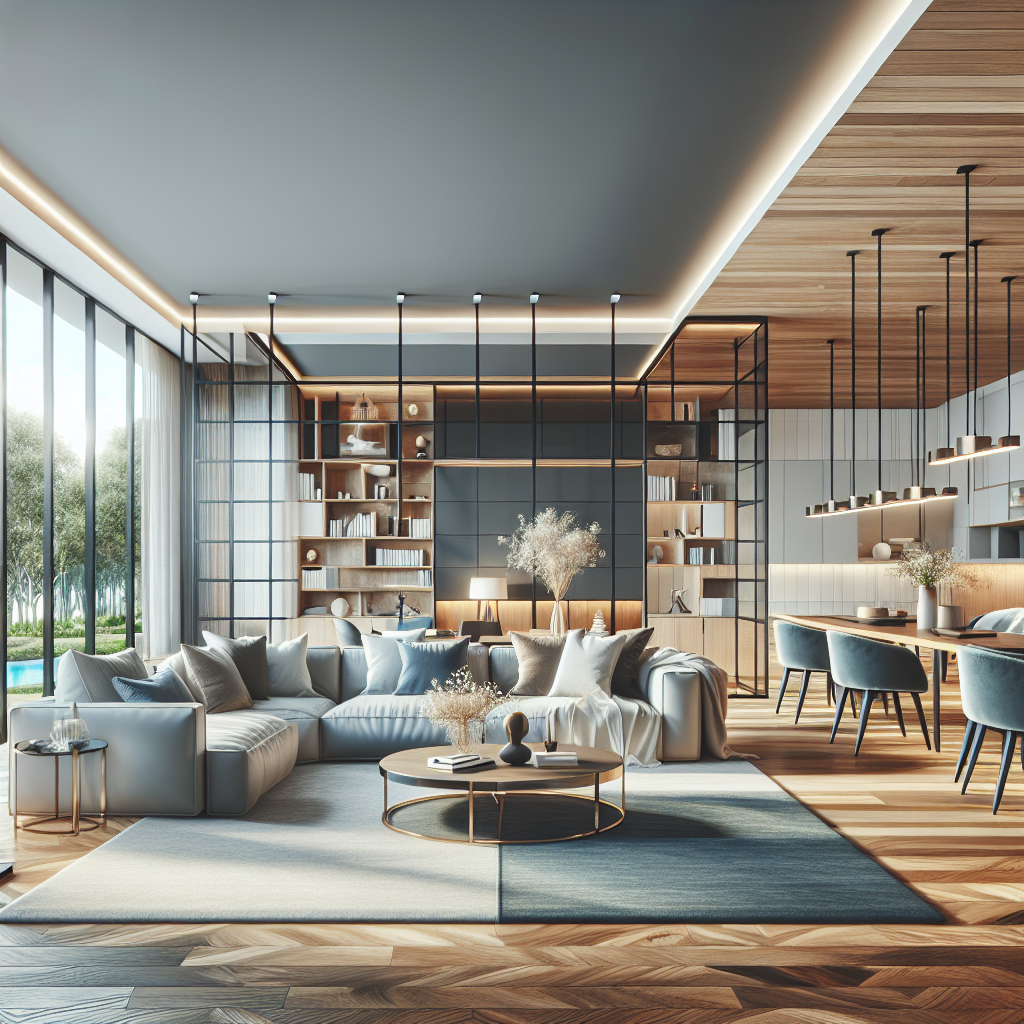
Common Areas (870 sq ft)
- Open great room: 400 sq ft living/dining/kitchen
- Gourmet kitchen: Island, full appliance package
- Utility room: In-unit washer/dryer
- Storage solutions: Built-in cabinets, pantry space
Layout #2: Family-Focused 3-Bedroom Design
Bedroom Configuration
- Master suite: 160 sq ft with en-suite bath
- Bedroom 2: 120 sq ft (perfect for children)
- Bedroom 3: 110 sq ft (home office/guest room)
Living Spaces
- Family room: Open concept with dining area
- Kitchen: Full-size appliances, breakfast bar
- 2 full bathrooms: One en-suite, one shared
- Laundry area: Dedicated space with storage
Layout #3: Multi-Generational 4-Bedroom Plan
Flexible Room Configuration
- Primary suite: Parents’ master with private bath
- Bedroom suite: In-law quarters with accessibility features
- 2 additional bedrooms: Children or guests
- 2.5 bathrooms: Maximum convenience
Accessibility Features
- ADA compliance options: Wide doorways, accessible bathroom
- Single-level living: No stairs required
- Universal design: Aging-in-place considerations
Benefits of 1200 Sq Ft ADU Orange County
Financial Benefits
Maximum Rental Income Potential
Orange County rental rates for 1200 sq ft ADU:
- Anaheim area: $2,800-$3,500/month
- Irvine area: $3,500-$4,200/month
- Newport Beach area: $4,000-$5,000/month
- Santa Ana area: $2,500-$3,200/month
Property Value Increase
- Typical value add: $200,000-$400,000
- ROI timeline: 3-5 years for full return
- Resale advantage: Properties with ADUs sell 10-15% faster
Tax Benefits
- Depreciation deductions: Rental property benefits
- Property tax considerations: Assessed value increase typically 60-80% of construction cost
- Utility cost sharing: Separate meters possible
Lifestyle Benefits
Multi-Generational Living
- Aging parents: Independent living with family nearby
- Young adults: College-age children with privacy
- Extended family: Visiting relatives, long-term guests
Flexible Space Usage
- Home office: Dedicated workspace separate from main house
- Creative studio: Art, music, or craft space
- Guest house: Luxury accommodations for visitors
- Teen suite: Privacy for teenagers
Privacy & Independence
- Separate entrance: No shared access with main house
- Complete kitchen: Full meal preparation capabilities
- Private bathroom facilities: No shared spaces required
- Utility independence: Separate HVAC, electrical systems
1200 Sq Ft ADU Orange County: City-Specific Requirements
Anaheim 1200 Sq Ft ADU Requirements
Zoning & Permits
- Permitted zones: R-1, R-2, R-3 residential zones
- Permit timeline: 60-90 days average
- Building fees: $6,000-$12,000 range
- School impact fees: $8,500-$15,000 for 1200 sq ft
Design Standards
- Height limits: 16 feet standard, 18 feet near transit
- Setbacks: 5 feet minimum from property lines
- Parking: Not required if within 0.5 miles of transit
- Fire sprinklers: Required for detached ADUs over 1000 sq ft
Irvine 1200 Sq Ft ADU Regulations
Permitting Process
- Pre-application meeting: Required for all ADU projects
- Plan review: 45-75 days typical timeline
- Inspection schedule: Foundation, framing, final inspections
- Certificate of occupancy: Required before tenant occupancy
Special Considerations
- HOA approval: Many Irvine properties require HOA consent
- Design review: Architectural compatibility required
- Landscape requirements: Screening and beautification standards
- Utility connections: Underground utility requirements
Newport Beach 1200 Sq Ft ADU Coastal Regulations
Coastal Commission Compliance
- Coastal development permit: May be required for some areas
- Height restrictions: 16 feet maximum in coastal zones
- Setback requirements: Enhanced setbacks from ocean
- Environmental review: Possible CEQA requirements
Design Guidelines
- Architectural style: Must complement neighborhood character
- Materials: Coastal-appropriate, weather-resistant materials
- Color palette: Earth tones, coastal colors preferred
- Landscaping: Drought-tolerant, native species required
Construction Process: 1200 Sq Ft ADU Orange County
Phase 1: Pre-Construction (Months 1-2)
Design Development
- Site evaluation: Topography, utilities, access assessment
- Architectural design: Custom plans for your property
- Engineering: Structural, electrical, plumbing design
- 3D renderings: Visualize your completed ADU
Permit Submission
- Plan preparation: Complete architectural drawings
- City submissions: Building permits, plan check fees
- Utility coordination: Water, sewer, electrical connections
- HOA approvals: If required by your community
Phase 2: Site Preparation (Month 3)
Site Work
- Excavation: Foundation preparation and utility trenching
- Utility installation: New electrical, water, sewer connections
- Foundation: Concrete slab or raised foundation system
- Inspection: Foundation inspection and approval
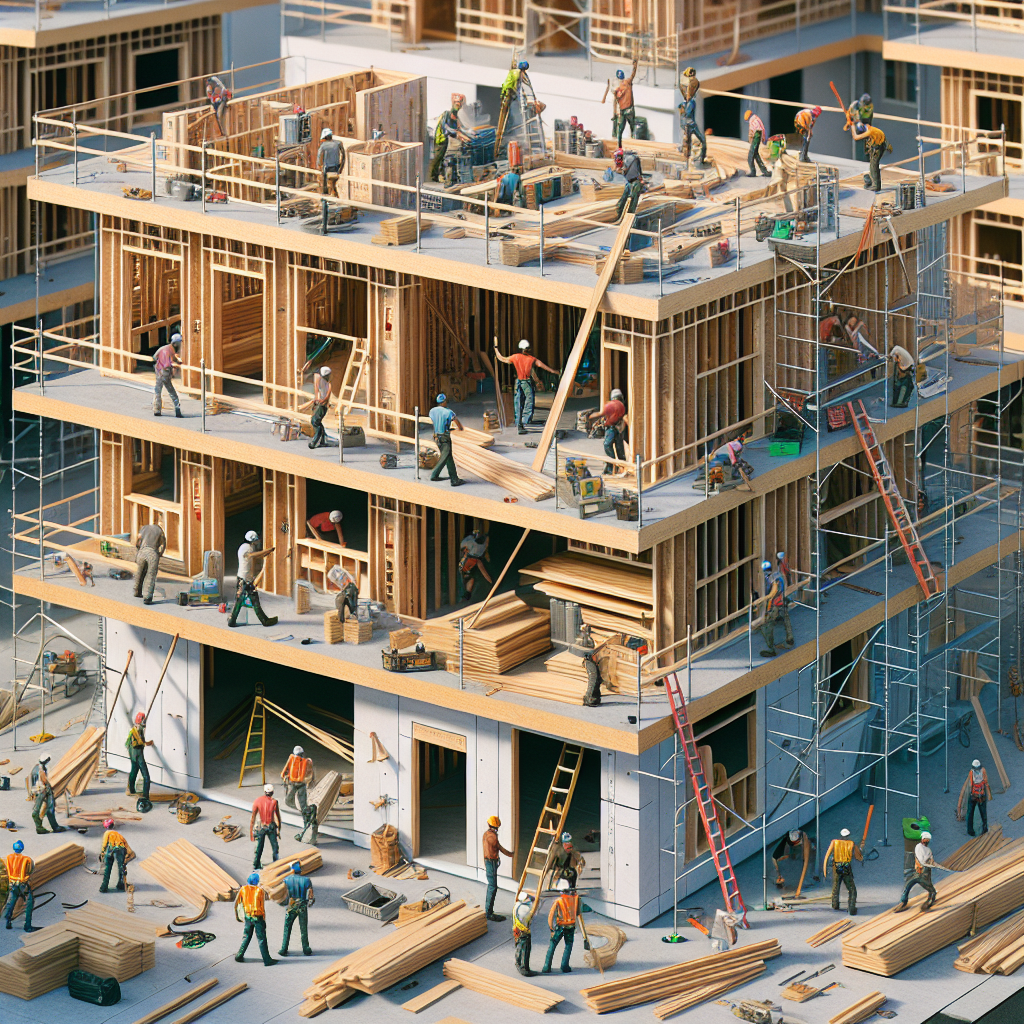
Phase 3: Construction (Months 4-7)
Structural Phase
- Framing: Wall, roof, and floor framing systems
- Roofing: Weather-tight roof installation
- Windows/doors: Energy-efficient installations
- Siding: Exterior finish matching or complementing main house
Systems Installation
- Electrical: Complete electrical system, panel installation
- Plumbing: All water supply and waste systems
- HVAC: Independent heating and cooling systems
- Insulation: Energy-efficient insulation package
Interior Finishing
- Drywall: Professional drywall and texture application
- Flooring: Luxury vinyl, hardwood, or tile installation
- Kitchen: Custom cabinetry and appliance installation
- Bathrooms: Complete bathroom finishing
Phase 4: Final Inspections (Month 8)
City Inspections
- Final building inspection: All systems and safety features
- Electrical final: Electrical system approval
- Plumbing final: Water and sewer system approval
- Certificate of occupancy: Legal permission to occupy
Why Choose L Square Construction for Your 1200 Sq Ft ADU Orange County
Orange County ADU Expertise
Track Record
- 200+ completed ADUs throughout Orange County
- Specialization: 1200 sq ft ADU designs and construction
- City relationships: Established relationships with all OC planning departments
- Permit success rate: 98% first-time permit approval
Design-Build Advantages
- In-house architects: Custom design capabilities
- Engineering team: Structural and civil engineering
- Single point of contact: Streamlined project management
- Quality control: Every phase supervised by our team
Complete Project Management
From Concept to Completion
- Initial consultation: Free property evaluation and feasibility study
- Design phase: Custom architectural plans and 3D renderings
- Permit management: Complete permit processing and city liaison
- Construction: Professional building with regular updates
- Final delivery: Walk-through and warranty coverage
Transparent Pricing
- Fixed-price contracts: No surprise costs or change orders
- Detailed estimates: Line-by-line cost breakdown
- Progress payments: Payment schedule tied to completion milestones
- Warranty coverage: Comprehensive warranty on all work
1200 Sq Ft ADU Orange County Investment Analysis
ROI Calculations
Rental Income Scenario
Investment: $420,000 (total project cost) Monthly rent: $3,200 (average Orange County) Annual income: $38,400 ROI: 9.1% annually
Property Value Scenario
Construction cost: $420,000 Property value increase: $320,000 (conservative estimate) Net investment: $100,000 Immediate equity gain: $220,000
Financing Options for 1200 Sq Ft ADU Orange County
Home Equity Line of Credit (HELOC)
- Interest rates: 7-9% (current market)
- Loan amount: Up to 80% of property value
- Repayment: Interest-only during construction
- Tax benefits: Interest may be deductible
Construction-to-Permanent Loans
- Construction phase: Interest-only payments
- Permanent financing: Converts to fixed mortgage
- Down payment: 20-25% typical requirement
- Rates: Competitive fixed rates available
Cash-Out Refinance
- Access equity: Refinance existing mortgage for higher amount
- Fixed rates: Lock in current low rates
- Single payment: One monthly payment for all debt
- Tax benefits: Mortgage interest deduction
Common Questions: 1200 Sq Ft ADU Orange County
Frequently Asked Questions
Q: Is a 1200 sq ft ADU worth the investment in Orange County?
A: Yes. A 1200 sq ft ADU Orange County offers the best cost-per-square-foot value and highest rental income potential. With rental rates of $2,500-$4,000/month, most homeowners see positive cash flow within the first year.
Q: How long does it take to build a 1200 sq ft ADU in Orange County?
A: Total timeline is typically 6-10 months:
- Design and permits: 2-3 months
- Construction: 4-7 months
- Final inspections: 2-4 weeks
Q: Do I need parking for a 1200 sq ft ADU Orange County?
A: Parking requirements vary by city and location:
- No parking required if within 0.5 miles of public transit
- No parking required if on-street permits aren’t available to ADU tenants
- 1 space typically required in other situations
Q: Can I build a 1200 sq ft ADU on any Orange County property?
A: Most single-family residential properties can accommodate a 1200 sq ft ADU, but factors include:
- Lot size: Adequate space for setbacks and access
- Zoning: Must be in residential zones
- Utility access: Ability to connect to water, sewer, electrical
- HOA restrictions: Some communities have additional limitations
Q: What’s the difference between attached vs detached 1200 sq ft ADU?
A:
- Detached ADU: Maximum 1200 sq ft, more privacy, higher construction cost
- Attached ADU: Limited to 50% of main house size (capped at 1200 sq ft), shared walls, lower cost
Q: Do I need fire sprinklers in a 1200 sq ft ADU Orange County?
A: Requirements vary by city:
- Anaheim: Required for detached ADUs over 1000 sq ft
- Irvine: Case-by-case based on distance from street
- Newport Beach: Required for all detached ADUs
- Cost: $3,000-$8,000 for sprinkler system
Getting Started: Your 1200 Sq Ft ADU Orange County Project
Step 1: Property Evaluation
Free Consultation Includes:
- Site assessment: Property suitability analysis
- Zoning verification: Confirm ADU eligibility
- Utility evaluation: Existing infrastructure assessment
- Preliminary design: Space planning and layout options
- Cost estimate: Detailed project investment analysis
Step 2: Design Development
Custom Design Process:
- Needs assessment: How will you use your ADU?
- Site constraints: Work with your property’s unique features
- Style preferences: Match or complement your main house
- Budget optimization: Maximize value within your budget
- 3D visualization: See your ADU before construction begins
Step 3: Permit & Approvals
We Handle Everything:
- Architectural plans: Complete construction documents
- Engineering: Structural, electrical, plumbing design
- City submittals: All permit applications and fees
- Plan corrections: Address any city review comments
- Approval tracking: Regular status updates
Step 4: Construction Excellence
Quality Construction Features:
- Premium materials: Durable, energy-efficient components
- Skilled craftsmen: Licensed, bonded, insured professionals
- Project management: Daily oversight and quality control
- Regular updates: Photo and progress reports
- Clean jobsite: Respectful of your property and neighbors
Ready to Build Your 1200 Sq Ft ADU Orange County?
Why L Square Construction Is Orange County’s #1 ADU Builder
Proven Results
✅ 200+ successful ADU projects completed ✅ 98% permit approval rate on first submission
✅ Average 8 months from start to completion ✅ 5-star reviews from satisfied homeowners ✅ Licensed, bonded, insured with all Orange County cities
Comprehensive Service
✅ Free consultations and property evaluations ✅ Fixed-price contracts with no hidden fees ✅ In-house design team and project management ✅ Complete permit handling and city liaison ✅ Quality warranty on all construction
Contact L Square Construction Today
📞 Phone: [(714) XXX-XXXX] – Speak with an ADU specialist
📧 Email: [info@lscontractor.com] – Get project information 🌐 Website: [lscontractor.com/1200-sq-ft-adu-orange-county]
📍 Service Areas: All Orange County cities
🏗️ Schedule Your FREE Consultation:
- Property evaluation and feasibility analysis
- Custom design consultation
- Detailed cost estimate
- Timeline and process overview
- Financing options discussion
Schema Markup for 1200 Sq Ft ADU Orange County
json
{
“@context”: “https://schema.org”,
“@type”: “Service”,
“name”: “1200 Sq Ft ADU Orange County Construction”,
“description”: “Complete 1200 square foot ADU design and construction services in Orange County, California. Maximum size ADUs with custom layouts, permits, and construction management.”,
“provider”: {
“@type”: “LocalBusiness”,
“name”: “L Square Construction”,
“address”: {
“@type”: “PostalAddress”,
“addressLocality”: “Orange County”,
“addressRegion”: “CA”,
“addressCountry”: “US”
},
“telephone”: “(714) XXX-XXXX”,
“url”: “https://lscontractor.com”
},
“areaServed”: [
“Anaheim”, “Irvine”, “Santa Ana”, “Newport Beach”, “Costa Mesa”,
“Huntington Beach”, “Garden Grove”, “Orange”, “Fullerton”, “Tustin”
],
“serviceType”: “ADU Construction”,
“offers”: {
“@type”: “Offer”,
“description”: “1200 sq ft ADU construction in Orange County”,
“priceRange”: “$350,000-$550,000”
}
}
FAQ Schema Markup
json
{
“@context”: “https://schema.org”,
“@type”: “FAQPage”,
“mainEntity”: [
{
“@type”: “Question”,
“name”: “How much does a 1200 sq ft ADU cost in Orange County?”,
“acceptedAnswer”: {
“@type”: “Answer”,
“text”: “A 1200 sq ft ADU in Orange County typically costs $350,000-$550,000 including design, permits, and construction. This represents $250-$350 per square foot, which is the most cost-effective size for ADU construction.”
}
},
{
“@type”: “Question”,
“name”: “Is 1200 sq ft the maximum ADU size in Orange County?”,
“acceptedAnswer”: {
“@type”: “Answer”,
“text”: “Yes, 1200 square feet is the maximum size allowed for detached ADUs in Orange County under California state law. This applies to all cities including Anaheim, Irvine, Santa Ana, and Newport Beach.”
}
}
]
}
Related Articles & Internal Links
- ADU Permit Requirements Orange County 2025: Complete Guide
- Garage Conversion ADU: Is Reusing the Existing Structure Right for You?
- Orange County ADU Cost Guide and Pricing Variables
- ADU Design-Build Planning for Orange County Properties
- ADU Services for Rental or Family-Use Goals
Creating the Perfect ADU Plan: Expert Tips for Maximum Space Utilization
Introduction
Welcome to the world of ADUs, where space is not just a luxury it’s a canvas for creativity! Whether you’re dreaming of a cozy backyard cottage, a chic granny flat, or even an innovative tiny house, crafting the perfect adu plan is your first step toward maximizing every square foot.
In recent years, accessory dwelling units have surged in popularity, and for good reason. They offer a fantastic solution for homeowners looking to create additional living space, whether for family members, guests, or even as a source of rental income. Imagine transforming that underutilized corner of your yard into a stylish and functional home office or an in-law suite that keeps your family close but gives everyone their own space.
But before you dive into the exciting world of ADU design, there are some essential factors to consider. From zoning regulations to sustainable building practices, understanding the landscape will help you navigate the complexities of your project with ease. This guide will equip you with expert tips and insights on how to create an accessory dwelling unit plan that not only meets your needs but also maximizes space utilization.
Key Takeaway: Your ADU plan should blend functionality and aesthetics while adhering to local regulations. Ready to explore how? Let’s dive in!
Understanding ADUs and Their Benefits
Accessory Dwelling Units (ADUs) are the Swiss Army knives of modern housing solutions. They come in various shapes and sizes, from cozy granny flats to sleek backyard cottages, providing homeowners with a versatile way to maximize their property. So, what exactly are these magical little spaces?
Definition of Accessory Dwelling Units (ADUs)
At their core, ADUs are secondary housing units located on the same lot as a primary residence. Think of them as your home’s sidekick perfect for guests, in-laws, or even generating rental income from accessory units. With the right adu plan, these compact living solutions can be tailored to fit your needs.
Benefits of ADUs for Homeowners
- Rental Income: Need a little extra cash? Renting out your ADU can be a fantastic way to boost your income without much hassle.
- Multi-Generational Living: With the rise of multi-generational families, having an in-law suite plan allows family members to live close while maintaining independence.
- Space Optimization: An ADU is an excellent way to utilize underused space in your backyard or garage turning that neglected area into a stylish tiny house plan.
- Sustainable Living: Many modern ADU designs focus on eco-friendly materials and energy-efficient features, making them a greener choice for housing.
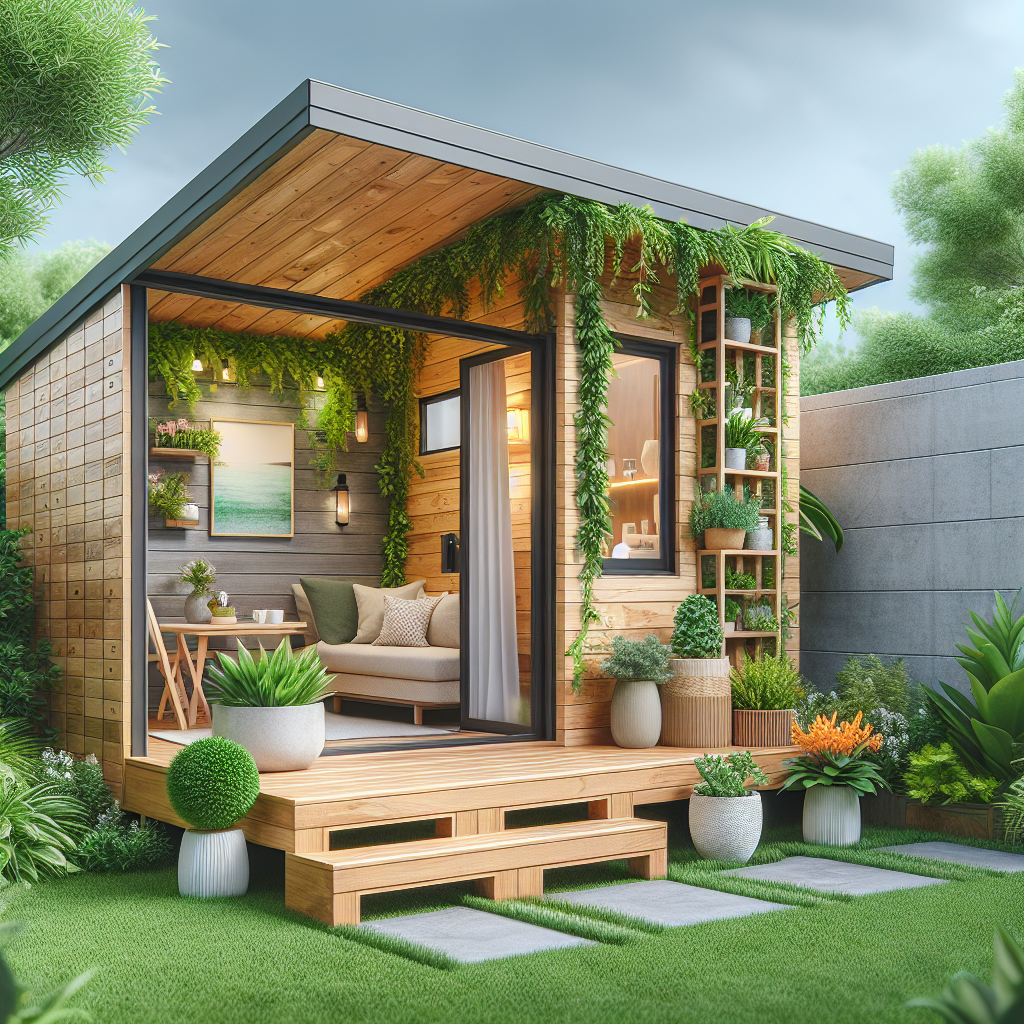
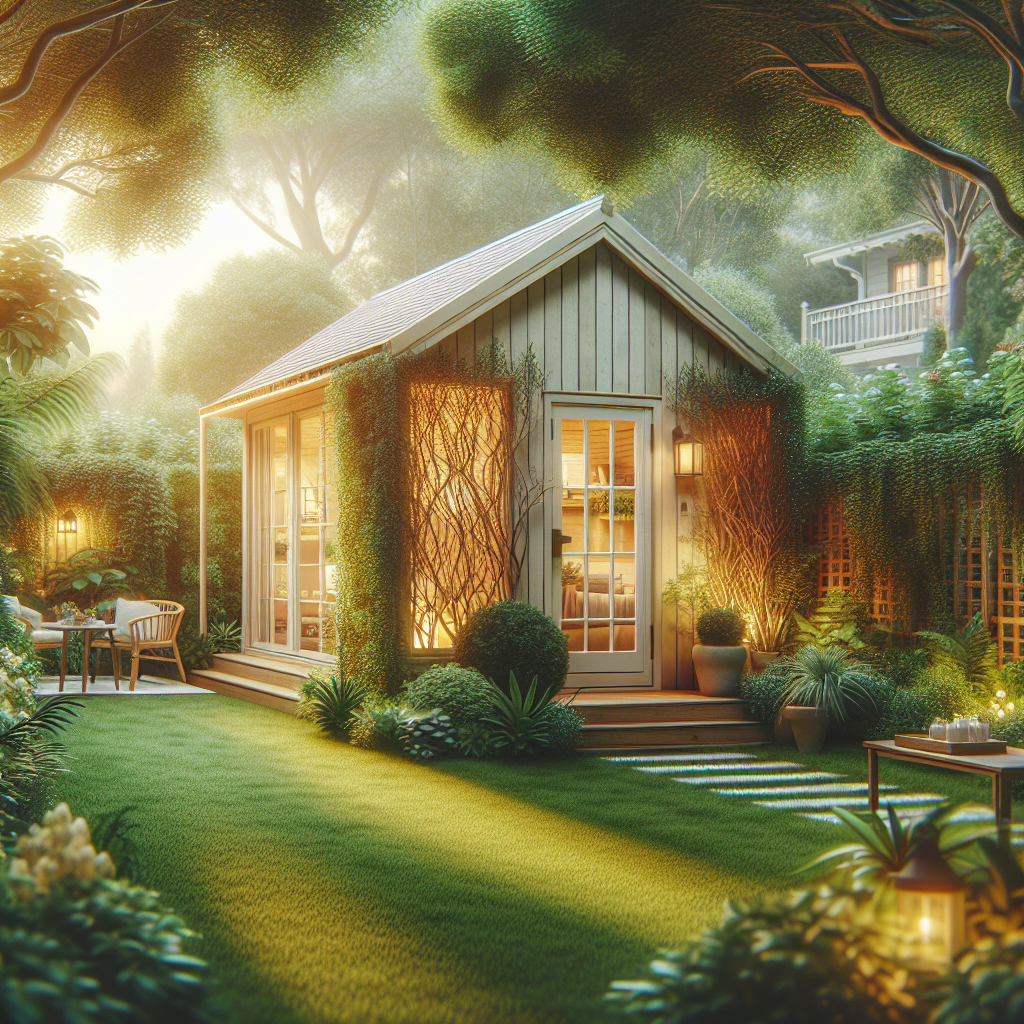
Types of ADUs: Granny Flats, Backyard Cottages, and More
The variety of ADU types means there’s something for everyone. Here’s a quick rundown:
- Granny Flats: Perfect for aging parents or guests think cozy and homey!
- Backyard Cottages: These charming units can serve as guest houses or rental properties.
- Tiny House Plans: Ideal for minimalist living enthusiasts who want to downsize without sacrificing comfort.
- Garage Conversions: Transform that dusty garage into a stylish studio apartment plan that wows visitors!
Key Takeaway: An effective adu plan not only enhances your property value but also provides flexibility for family dynamics and financial benefits. Whether you’re considering custom adu designs or prefab adu options, the possibilities are endless!
Key Considerations for Your ADU Plan
Creating an adu plan is no small feat. It’s like trying to fit a giraffe into a Mini Cooper you need to be strategic and creative! Let’s break down the essential considerations that will make your accessory dwelling unit plan not just functional but fabulous.
Zoning Regulations for ADUs
Before you get too excited about your new backyard cottage or granny flat, check the zoning regulations in your area. Think of it as the rulebook for your ADU dream. Each city has its own set of zoning laws that dictate where and how you can build an accessory dwelling unit. Some key points to consider include:
- Setback requirements: How far must your ADU be from property lines?
- Height restrictions: Is there a limit on how tall your structure can be?
- Parking requirements: Will you need additional parking spaces?
Building Permits for ADUs
Next up, let’s talk permits. Securing the necessary building permits is like getting a backstage pass to the concert of home improvement it’s essential! Without them, you could face fines or even have to tear down your newly constructed masterpiece. Here’s what you’ll typically need:
- A detailed site plan showing the proposed layout
- Architectural drawings that comply with local codes
- A completed application form and associated fees
Site Selection and Layout Considerations
Your site selection is crucial it’s like picking the right stage for a performance. You want to ensure that your ADU complements your main residence while maximizing space utilization. Consider these factors when planning:
- Proximity to utilities: Is it easy to connect water, electricity, and sewage?
- Access points: How will residents access this new unit? Will it have its own entrance?
- Sunlight and views: Does the location allow for natural light and pleasant vistas?
Takeaway: Before diving headfirst into construction, make sure you’re well-versed in zoning regulations, secure all necessary permits, and choose a site that enhances both functionality and aesthetics.
Space Optimization Techniques in ADU Design
When it comes to crafting the perfect adu plan, space optimization is the name of the game. Think of your ADU as a Swiss Army knife compact, versatile, and ready for anything! Here are some techniques that will help you maximize every square inch:
Compact Living Solutions and Small Space Living Ideas
Embrace the philosophy of less is more! Compact living solutions are not just trendy; they’re essential for effective accessory dwelling unit design. Here’s how to make it work:
- Open Floor Plans: Ditch those walls! An open layout creates a sense of spaciousness and flow.
- Vertical Space Utilization: Install shelves that reach for the sky. Think tall bookcases or hanging plants to draw the eye upward.
- Outdoor Integration: Use large windows or sliding doors to blend indoor and outdoor spaces, expanding your visual footprint.
Multi-Functional Furniture and Storage Solutions
If you’ve ever wished your couch could transform into a bed or your coffee table could double as storage, you’re not alone! Multi-functional furniture is a hero in small house floor plans. Consider these tips:
- Sofa Beds: Perfect for hosting guests without sacrificing space.
- Nesting Tables: Great for entertaining just pull them out when needed and tuck them away when not!
- Beds with Built-In Storage: Utilize under-bed space for seasonal clothing or extra linens.
Innovative Small Home Architecture for ADUs
The architectural design of your ADU can significantly impact its functionality. Here are some innovative ideas to consider:
- Pocket Doors: These sliding doors save space while adding a modern touch.
- Bump-Outs or Bay Windows: Create cozy nooks that add character without consuming too much space.
- Sustainable Materials: Incorporate eco-friendly options like reclaimed wood or bamboo, which can also enhance aesthetics!
Did you know? Innovative designs can increase rental income from accessory units by making them more appealing to potential tenants!
The key takeaway here? A well-thought-out ADU plan incorporates clever design elements that make small spaces feel larger and more functional. So get creative with your design choices your future self (and any guests) will thank you!
Sustainable and Energy-Efficient ADU Planning
When it comes to crafting the perfect adu plan, sustainability and energy efficiency are not just buzzwords they’re essential ingredients for a modern accessory dwelling unit. Think of your ADU as a mini eco-village, where every design choice contributes to a greener planet.
Eco-Friendly Accessory Dwelling Units Design Principles
First things first, let’s talk about the backbone of any sustainable adu design: eco-friendly principles. Here are a few key elements to consider:
- Passive Solar Design: Position windows and overhangs to maximize natural light while minimizing heat loss.
- Green Roofs: Consider a living roof that provides insulation, reduces stormwater runoff, and promotes biodiversity.
- Rainwater Harvesting: Capture rainwater for irrigation or even greywater systems for flushing toilets.
Sustainable Materials and Construction Practices
Your choice of materials can make or break your sustainability game. Opt for locally-sourced, recycled, or reclaimed materials whenever possible. Here’s a quick list of materials that will keep both your conscience and your budget happy:
- Bamboo Flooring: A rapidly renewable resource that’s durable and stylish.
- Recycled Steel Frames: Stronger than wood and often made from post-consumer waste.
- Sustainable Insulation: Look for options like sheep’s wool or cellulose made from recycled paper.
Energy-Efficient Features to Include in Your ADU Plan
No one wants to be shocked by their utility bills! Incorporating energy-efficient features into your ADU plan can save you money while reducing your carbon footprint. Here are some must-have features:
- Energy Star Appliances: These appliances use less energy without sacrificing performance.
- LED Lighting: Brighten up your space with lights that last longer and consume less power.
- Smart Thermostats: Control your heating and cooling remotely for optimal efficiency.
A study by the U.S. Department of Energy indicates that homes designed with energy efficiency in mind can save up to 30% on energy costs annually!
The beauty of sustainable planning is that it not only benefits the environment but also enhances the livability of your space. With innovative small home architecture for ADUs on the rise, you can create a compact yet functional living area that embraces minimalist living spaces without compromising on comfort.
Your journey toward an eco-conscious ADU doesn’t have to be daunting; it just requires some thoughtful planning and creativity. So roll up those sleeves your perfect sustainable ADU awaits!
Selecting the Right Design for Your Needs
Choosing the right design for your ADU plan is like picking the perfect outfit for a first date it needs to fit well, reflect your style, and be functional enough to handle anything that comes your way. With so many options available, how do you decide? Let’s break it down!
Custom ADU Designs vs. Prefab Options
First up, let’s talk about custom versus prefab. Custom ADU designs are like bespoke suits tailored to your exact specifications and needs. You can choose everything from layout to materials, ensuring that every inch of space is optimized for your lifestyle.
On the flip side, prefab options are like ready-to-wear fashion: quicker to assemble and often more affordable. These designs can be a great choice if you’re looking for something stylish without the long wait. Just remember: while they may save time and money, they might not perfectly fit your unique vision.
Garage Conversion Ideas and Their Benefits
If you’ve got a garage that’s collecting dust (or maybe just old bikes), consider converting it into an ADU! Garage conversions can be a fantastic way to utilize existing space without starting from scratch. Plus, they often require fewer permits than new builds, making them an easier route through the zoning regulations for ADUs.
- Cost-effective use of existing structures
- Faster construction timelines
- Potential for rental income from accessory units
Studio Apartment Plans vs. In-Law Suite Plans
Now let’s dive into studio apartment plans for backyard units versus in-law suite plans. If you’re looking to create a cozy retreat or even a rental unit, studio apartments are perfect with their open layouts and efficient use of space. They’re great for compact living solutions!
However, if you want to accommodate family members or guests with a bit more privacy (think grandma or your college kid moving back in), in-law suite plans might be more suitable. These designs typically feature separate bedrooms and bathrooms, providing comfort while keeping everyone under one roof.
A Trendy Twist: Modern Granny Flat Designs
Let’s not forget about modern granny flat designs that bring a fresh twist to traditional concepts! These aren’t just small houses; they’re innovative small home architecture that maximizes style without compromising on function. Think sleek lines, eco-friendly materials, and energy-efficient features that make them both chic and sustainable.
Selecting the right design ultimately hinges on understanding your specific needs whether it’s maximizing rental income from accessory units or creating an inviting space for family gatherings. So take some time to reflect on what matters most in your ADU plan!
- Evaluate your lifestyle needs.
- Consider budget constraints versus desired features.
- Consult with experts in ADU architectural services to explore custom adu designs that fit your vision.
Navigating the Construction Process for Your ADU Plan
So, you’ve got your ADU plan all set, and you’re ready to dive into the construction phase. But hold your horses! Before you start swinging hammers and mixing cement, let’s talk about how to navigate this process like a pro. Think of it as a treasure map follow the right path, and you’ll find your way to that shiny new accessory dwelling unit!
A Comprehensive ADU Construction Guide Overview
Your journey begins with a solid understanding of the construction process. Here’s a quick rundown:
- Pre-Construction Planning: This includes finalizing your plans, ensuring all designs meet local zoning regulations for ADUs, and securing building permits for ADUs.
- Site Preparation: Clear the area where your new unit will sit. This might involve demolishing an old structure or leveling the ground.
- Foundation Work: A sturdy foundation is crucial! Whether it’s a slab or crawl space, this step sets the stage for everything else.
- Framing and Structure: Build up those walls! This is where your custom ADU designs start taking shape.
- Utilities Installation: Plumbing, electrical work, and HVAC systems go in here. It’s like giving your ADU its lifeblood!
- Finishing Touches: Paint, flooring, fixtures this is where you can let your creativity shine through!
Selecting the Right Contractor for Your Project
This is not just any contractor; you want someone who specializes in ADUs. Here are some tips to find that perfect match:
- Do Your Homework: Look for contractors with experience in building accessory dwelling units. Check their previous work a portfolio speaks volumes!
- Get Multiple Quotes: Don’t settle on the first estimate. Compare costs and services from different contractors to ensure you’re getting a fair deal.
- Check References: Ask for client testimonials or reviews. A reputable contractor should have happy customers singing their praises!
Tips for Managing the Construction Timeline Effectively
No one likes delays they can be as frustrating as waiting for a pot of water to boil! Here are some strategies to keep things on track:
- Create a Realistic Timeline: Work with your contractor to establish a timeline that considers potential hiccups along the way.
- Regular Check-Ins: Stay in touch with your contractor throughout the process. Weekly updates can help catch any issues before they snowball.
- Budge for Unexpected Costs: It’s wise to have a little wiggle room in your budget for those pesky surprises that always seem to pop up during construction.
The average time frame for constructing an ADU is typically between 4-6 months, depending on size and complexity. Planning ahead can save you time and money!
Navigating through the construction process of your ADU plan doesn’t have to feel like climbing Mount Everest. With careful planning and the right team by your side, you’ll be well on your way to enjoying that beautiful new space whether it’s for family members, rental income from accessory units, or even just an office escape from everyday life!
The Future of Living: Embracing Multi-Generational Living Designs with ADUs
As the world evolves, so do our living arrangements. The rise of multi-generational living is not just a trend; it’s a necessity for many families. With soaring housing prices and the desire for close-knit family dynamics, Accessory Dwelling Units (ADUs) are stepping into the spotlight as the perfect solution.
Imagine this: your aging parents live just steps away from you in a cozy, self-contained granny flat, while your young adult children have their own space in a stylish backyard cottage. This is not just wishful thinking; it’s a reality that many families are embracing today. The flexibility of an adu plan allows for various configurations to suit different family needs.
- The Rise of Multi-Generational Living Arrangements: More families are opting to live together under one roof (or two) to share resources and provide support.
- The Role of Detached Accessory Dwelling Units: These units can serve as independent homes that foster privacy while keeping family members close.
- Benefits Beyond Proximity: From shared childcare responsibilities to reduced living costs, the advantages are plentiful!
But before you rush into drafting your adu design, consider these key points:
- Space Planning: Think about how each unit will function will it be an in-law suite or a home office? Your design should reflect these needs.
- Sustainability Matters: Opting for energy-efficient ADUs not only saves money but also aligns with eco-friendly values a win-win!
- Zoning Regulations: Always check local zoning laws to ensure your plans comply. You don’t want any surprises when applying for building permits!
Key Takeaway: Multi-generational living designs are more than just practical they represent a shift towards community-oriented lifestyles that prioritize family connections and sustainable living.
If you’re considering an ADU as part of your multi-generational living strategy, start sketching out ideas today! A well-thought-out plan can pave the way for a harmonious living situation that meets everyone’s needs.
Conclusion
- Recap of key points discussed
- Encouragement to start planning your custom adu design
< / ul >
< / section >
If your lot has the room, a detached ADU is usually the smarter build. It rents for more, appraises better, gives both households real privacy, and keeps your construction crew out of your main house. An attached ADU only wins when the lot is too tight for a freestanding unit, when you want to add square footage to the home itself, or when you’re trying to hold the budget down. After 200-plus of these in Orange County and LA, that’s the pattern I see hold up project after project. The rest comes down to your specific lot — so here’s how I’d actually weigh it.
Detached vs attached at a glance
Before the detail, here’s how the two stack up on the factors homeowners ask me about most. None of these is a hard rule — your parcel decides the final call — but this is the pattern after 200-plus builds across OC and LA.
| Factor | Detached ADU | Attached ADU |
|---|---|---|
| Build cost | Clean new structure; longer utility trench | Saves a shared wall, but demo & tie-ins can erase the savings |
| Privacy | Own entrance, walls & outdoor space — best for rentals | Shares a wall and often a yard — better for close family |
| Lot needs | Needs a real backyard that fits the 4-ft setbacks | Fits tight lots; built off the back or side of the house |
| Rent & resale | Higher rent; reads as a separate, flexible dwelling | Solid rent; adds finished square footage to the main home |
| Utility runs | Long trench across the yard for water, sewer & power | Short runs tied in at the wall |
| Future flexibility | Always a standalone unit | Can later merge back into the main house |
The real cost difference
People assume attached is always cheaper because it “shares a wall.” Sometimes. Not always.
An attached ADU saves you on one exterior wall, one roofline section, and a shorter run for water and sewer because you’re tying into the house right there. That’s real money. But the moment you cut into the existing structure, you inherit whatever’s behind that wall — an undersized electrical panel, old plumbing, framing that doesn’t match current code. I’ve had attached builds where the demo and structural tie-in ate up most of what we “saved” on the shared wall.
A detached ADU is its own clean box. We pour a new foundation, frame four new walls, and we’re not fighting your 1970s house the whole way. The trade-off is the longer utility trench across the yard, which I’ll get to.
My honest take: budget the two as closer than you’d think. If a salesperson tells you attached is dramatically cheaper without seeing your panel and your existing plumbing, be skeptical.
Privacy — where detached quietly wins
This is the factor people underweight until they’re living it. A detached ADU has its own entrance, its own walls, its own outdoor space. Your tenant — or your mother-in-law, or your adult kid — comes and goes without walking past your kitchen window. Nobody hears the other household’s TV through a shared wall.
An attached ADU shares a wall and often a yard. You can build it well, insulate that wall properly, and orient the entrance away from your front door — and we do — but you can’t fully erase the fact that two households are touching. For a rental, that proximity can mean more friction and more texts to you at 9pm.
If the ADU is for family you genuinely want close, attached can be a feature, not a bug. For a pure rental, detached privacy is worth paying for.
Lot size, setbacks, and what your land will actually allow
This is the question that decides it for most people, and it’s not about preference — it’s about whether the unit physically fits.
Per California HCD, the state requires only 4-foot side and rear setbacks for an ADU, which is far more generous than most older zoning. State law also lets an ADU go up to roughly 1,200 square feet. For an attached ADU specifically, California allows it to be up to 50% of the primary home’s size — so a 2,000 sq ft house can support up to a 1,000 sq ft attached unit, which is a real rule worth knowing.
Here’s how that plays out on a real lot: if you’ve got a narrow side yard and a shallow backyard, a freestanding unit may not fit once you honor the 4-foot setbacks and leave a path to the entrance. That’s exactly when attached makes sense — you build off the back or side of the house and you’re not trying to squeeze a separate building into space you don’t have. Tight infill lots in older Santa Ana and Anaheim neighborhoods land here constantly. A wide lot with a deep backyard, on the other hand, is practically asking for a detached unit.
We always pull your parcel and check the real dimensions before recommending a type. Eyeballing the backyard fools people.
Rental income and resale value
For income, detached generally pulls a higher rent. Renters pay a premium for a private, standalone home with no shared wall — it lives like a small house, not an add-on. On resale, a clearly separate dwelling tends to read as a more valuable, more flexible asset to both buyers and appraisers.
That said, an attached ADU isn’t weak here. Because it adds finished square footage that’s physically part of the home, it can boost the appraised value of the whole property in a clean way, and it still commands solid rent. If your long game is one day folding the ADU back into the main house — knocking out that shared wall to make one big home — attached gives you that option. Detached never does.
Utility tie-ins — the part nobody warns you about
Here’s where detached costs you back some of its advantages. A freestanding unit needs water, sewer, and electrical run all the way out to it — that’s trenching across your yard, and on a deep lot or a sloped one, the trench is long and the dig is the expensive part. We sometimes hit irrigation, old lines, or rock back there.
An attached ADU ties into the house’s systems right at the wall, so the runs are short. The catch: if the existing panel can’t carry the new load, you’re upgrading the main panel regardless of type, and that’s its own line item.
One thing in your favor either way — under California law, converting a garage to an ADU doesn’t trigger replacement parking, so you don’t have to give up driveway space to add stalls. That removes a hurdle that used to kill a lot of these projects.
So which one should you build?
It comes down to two questions: does the land fit a freestanding unit, and what are you solving for — income, family, or budget? Here’s how I sort it.
- Build detached if your lot has the room
You have a real backyard, the unit is mainly a rental or future resale play, privacy matters, and the longer utility trench doesn’t scare you. This is the default winner when the land allows it.
- Build attached if the lot is tight or family is close
A freestanding unit won’t fit the setbacks, you want to keep family close, you’re holding the budget down, or you might one day merge the ADU into the main home.
- Consider a JADU for the leanest budget
A JADU — a junior ADU under 500 sq ft carved from the existing house — is the most budget-friendly version of the attached approach.
Want the full breakdown on the freestanding route, including layouts and permit timeline? Read our detached ADU guide. If you’d rather have us pull your parcel and tell you straight which type fits, contact us or call (949) 374-7980.
Dig deeper
Detached ADU guide — costs, designs & permits
The freestanding route in full: layouts, budget, and permit timeline.
Attached & junior ADUs
When sharing a wall makes sense — and the JADU budget path.
The complete ADU guide
Process, timeline, and financing overview, start to finish.
The Ultimate Guide to Full House Remodeling: Transform Your Home from Top to Bottom
Introduction
Welcome to the world of full house remodeling, where dreams of your perfect home come to life! If you’ve ever watched a home renovation show and thought, “I could do that!” let’s be real, you probably can. But embarking on a complete home makeover is no walk in the park; it’s more like a thrilling roller coaster ride filled with twists, turns, and maybe a few unexpected surprises.
Whether you’re looking to give your space a fresh new look or you’re diving into an extensive home remodeling project that transforms every nook and cranny, this guide has got you covered. We’ll explore everything from planning your whole house redesign to selecting the right house renovation services that will make your vision a reality.
But before we dive into the nitty-gritty of planning and execution, let’s take a moment to appreciate what full house remodeling truly entails. Think of it as giving your entire property a much-needed spa day complete with facials (hello, new paint!), massages (those walls need love too!), and maybe even some liposuction (out with the old, in with the new!).
So buckle up as we embark on this journey of total home transformation! Whether you’re dreaming of an open-concept living space or just want to revamp your outdated kitchen, each step will bring you closer to achieving that coveted full-service home remodeling experience.

Understanding Full House Remodeling
So, what exactly is full house remodeling? Think of it as a complete makeover for your home, where every nook and cranny gets the attention it deserves. This isn’t just a fresh coat of paint or swapping out a few light fixtures; we’re talking about a holistic approach to your living space that can transform it into something entirely new.
The importance of comprehensive home renovation cannot be overstated. A full house remodel allows you to address outdated layouts, improve energy efficiency, and enhance the overall aesthetic of your home. It’s like giving your house a second chance at life!
Did you know that homes with extensive renovations often see an increase in property value? According to recent studies, a well-executed full-scale remodeling project can yield returns of up to 70% on your investment!
Benefits of a Complete Home Makeover
- Increased Property Value: A full property renovation can significantly boost your home’s market appeal.
- Enhanced Functionality: Tired of cramped spaces? A complete interior and exterior remodel allows you to reconfigure layouts for better flow.
- Modernization: Incorporating current design trends can make your home feel fresh and inviting.
- Energy Efficiency: Upgrading appliances and insulation during an entire home renovation can reduce utility costs long-term.
- Personalization: Tailor every aspect to fit your lifestyle from room sizes to finishes, it’s all about you!
A common misconception is that full house remodeling is only for those looking to sell their homes. In reality, many homeowners embark on this journey simply to create their dream living environment. Whether it’s an all-encompassing home upgrade or an extensive residential remodel, the goal is often the same: comfort and style.
In summary, understanding full house remodeling means recognizing its potential as a total home transformation. It’s not just about aesthetics; it’s about creating a space that reflects who you are while increasing functionality and value. Ready to dive deeper into planning your project? Stick around!
Planning Your Full House Remodeling Project
So, you’ve decided to embark on the thrilling journey of full house remodeling. Buckle up, because this is where the magic happens! But before you dive headfirst into a sea of paint swatches and tile samples, let’s get organized. Proper planning is your best friend in this adventure.
Key Planning Steps: Setting a budget, creating a timeline, and choosing a design are crucial to ensure your remodeling project doesn’t turn into an episode of a reality show gone wrong!
Setting a Realistic Budget
First things first: money talks! Determine how much you’re willing to spend on your complete home makeover. A good rule of thumb is to allocate about 10-20% of your total budget for unexpected expenses. Yes, those pesky surprises will happen like discovering that your walls are made of marshmallows instead of drywall.
Creating a Timeline for the Project
No one likes waiting forever for their dream home. Create a timeline that outlines major milestones in your entire home renovation. Factor in time for design approvals, construction phases, and even those inevitable delays (thanks again, marshmallow walls!).
Choosing the Right Design and Style
Your home should reflect your personality unless you’re into taxidermy or neon green walls. Spend time researching styles that resonate with you. Whether it’s modern minimalism or cozy farmhouse charm, make sure it aligns with your vision for an entire property overhaul.
Pro Tip: Use platforms like Pinterest or Houzz to gather inspiration and create mood boards. This can help communicate your ideas clearly to contractors.
Avoiding Common Misconceptions
Many homeowners think they can DIY their way through a full-scale remodeling project. While we applaud ambition, some tasks are best left to professionals. For example, plumbing and electrical work require expertise unless you’re looking for an unintentional water feature in your living room!
“A well-planned remodel can yield up to a 70% return on investment.”
– Remodeling Magazine
The key takeaway here? A successful full house remodel isn’t just about picking pretty colors; it’s about strategic planning that considers budget, timeframes, and professional help when needed. Now that you’re armed with this knowledge, it’s time to get started on transforming your space!

Choosing the Right House Renovation Services
When it comes to full house remodeling, selecting the right house renovation services can feel like dating in the digital age there are plenty of options, but not all of them are a match made in heaven. So how do you sift through the noise and find your perfect contractor? Let’s break it down.
Researching Contractors and Available Services
Start your journey by diving deep into research. Look for contractors who specialize in complete home makeovers or have a proven track record in residential remodeling. Websites, reviews, and social media are goldmines for gathering intel. Pay attention to:
- Online reviews and testimonials are past clients raving or ranting?
- A portfolio showcasing their work pictures speak louder than words!
- Specializations that align with your vision for an entire home renovation.
Evaluating Credentials and Experience
Once you’ve narrowed down your list, it’s time to vet your potential partners like you’re auditioning for a reality show. Check their credentials:
- Licensing: Ensure they’re properly licensed to operate in your area.
- Insurance: They should carry liability insurance to protect against any mishaps.
- Experience: Look for contractors with extensive experience in full-scale remodeling projects similar to yours.
The Importance of Communication
Your contractor should be someone you feel comfortable communicating with after all, they’ll be the voice guiding you through your entire property overhaul. Make sure they are:
- Responsive: Do they reply promptly to inquiries?
- Candid: Are they transparent about timelines, costs, and potential challenges?
- A good listener: Do they understand your vision for a top-to-bottom house renovation?
Takeaway: Choosing the right house renovation services is crucial for a successful full home upgrade. Invest time in research, communication, and evaluation to ensure your contractor is as committed to your dream as you are!
The Process of Whole House Redesign
Embarking on a full house remodeling journey is like signing up for a reality show where the stakes are high, and the prize is your dream home! The process may seem daunting, but with a little planning and creativity, it can be a smooth ride. Here’s how to navigate the exciting waters of whole house redesign.
Initial Consultation and Assessment
The first step in your entire home renovation adventure is the initial consultation. This is where you sit down with your contractor (think of them as your home’s personal trainer) to discuss your vision. Bring along any Pinterest boards or mood boards you’ve been curating!
- Discuss Your Goals: What do you want to achieve? More space? A modern look? A cozy vibe?
- Budget Talk: Be upfront about what you can spend. This is crucial for setting realistic expectations.
- Assessment: The contractor will evaluate your current space, identifying potential challenges and opportunities.
Design Phase and Approvals
Once you’ve laid the groundwork, it’s time for the design phase. This part is like picking out an outfit for a big date everything needs to match perfectly!
- Create Plans: Your contractor will develop detailed plans that reflect your aesthetic desires while considering structural integrity.
- Select Materials: Choose finishes, colors, and fixtures that resonate with your style. Remember, this isn’t just about looks; durability matters too!
- Approval Process: Depending on local regulations, you may need to secure permits before construction begins. Don’t skip this step unless you want the building police knocking at your door!
Construction Phase: What to Expect During Renovations
The construction phase is where all those plans come to life! Picture it as watching a caterpillar transform into a butterfly exciting yet slightly chaotic.
- Dust & Disruption: Expect some mess! It’s part of the process. Consider investing in some good earplugs and dust masks.
- Regular Updates: Stay in touch with your contractor throughout this phase. Regular check-ins ensure everything aligns with your vision.
- Tweaks & Adjustments: Be prepared for minor changes along the way; flexibility can lead to unexpected improvements!

A successful whole house redesign isn’t just about aesthetics; it’s about creating a space that functions well for you and your family. Remember: communication with your contractor is key!
This entire process culminates in what we call a total home transformation. By following these steps diligently, you’re not just getting a new look; you’re investing in an experience that enhances how you live every day!
Key Considerations for an Entire Home Renovation
Embarking on a full house remodeling journey is like jumping into a thrilling adventure. But before you grab your hard hat and start swinging a sledgehammer, there are some key considerations to keep in mind that will make your entire home renovation smoother than a freshly painted wall.
Sustainability and Energy Efficiency Options
In today’s eco-conscious world, integrating sustainability into your complete home makeover isn’t just trendy it’s essential. Think of it as giving Mother Nature a high-five while saving some cash on energy bills!
- Consider energy-efficient appliances that reduce consumption.
- Opt for sustainable materials like bamboo or recycled wood.
- Install solar panels to harness the power of the sun (and your inner superhero).
Selecting Materials for Durability and Aesthetics
Your choice of materials can make or break your renovation. It’s like choosing the perfect outfit for a first date you want to look good, but it also needs to last through dinner and dancing!
- Choose high-quality flooring that can withstand foot traffic (and the occasional pet mishap).
- Select paint finishes that are not only beautiful but also easy to clean.
- Invest in countertops made from durable materials like quartz or granite because no one wants to deal with chips and scratches.
Avoiding Common Pitfalls in Extensive Home Remodeling Projects
No one wants their dream renovation to turn into a nightmare. Here are some common pitfalls to dodge like they’re hot coals:
- Neglecting to plan for unexpected costs because surprise expenses are about as welcome as an uninvited guest at a party.
- Failing to communicate clearly with your contractor, which can lead to misunderstandings (and possibly a very different vision than you had in mind).
- Not considering the flow of space; remember, it’s not just about looks functionality matters too!
Takeaway: Prioritize sustainability, choose durable materials, and avoid common pitfalls for a successful full-scale property renovation. Your future self will thank you!
The Role of Design in Total Home Transformation
When it comes to full house remodeling, design is not just the icing on the cake; it’s the very foundation that holds everything together. Think of your home as a well-choreographed dance: every element needs to move in harmony, from the layout to the color palette. So, let’s dive into how design plays a pivotal role in transforming your space from drab to fab!
Integrating Modern Design Trends into Your Remodel
Staying on top of current trends can make your home feel fresh and inviting. Whether it’s embracing minimalism or incorporating biophilic design (bringing nature indoors), these trends can elevate your space. For instance, consider open-concept layouts that promote flow and connectivity perfect for those family gatherings where everyone ends up in the kitchen anyway!
Cohesive Interior and Exterior Design Strategies
Your home should tell a story, and that story should be consistent from the inside out. Imagine walking into a stunning modern kitchen only to step outside to a mismatched patio. A cohesive design strategy ensures that both interior and exterior complement each other, creating a seamless transition. Think about using similar materials or color schemes across both spaces for that *wow* factor.
The Impact of Space Planning on Functionality and Flow
Good design is like a good friend: it knows how to make you feel comfortable and at ease. Effective space planning enhances functionality and improves traffic flow throughout your home. Consider how you navigate your daily life are there bottlenecks where everyone seems to trip over each other? A thoughtful redesign can eliminate those awkward moments, making every square foot work harder for you.
Key Takeaway: Prioritizing design in your total home transformation can significantly enhance both aesthetics and functionality. From modern trends to cohesive strategies, every decision impacts how you experience your space.
Post-Renovation: Maintaining Your New Space
Congratulations! You’ve just completed a full house remodeling project, and your home looks fabulous. But wait before you pop the champagne and kick back on that brand-new sofa, let’s talk about how to keep your stunning space looking fresh and fabulous for years to come.
Tips for Upkeep After a Major Home Remodel Project
- Regular Cleaning: Dust and dirt are like uninvited guests at your renovation party. Make a habit of cleaning surfaces regularly to maintain that just-renovated shine.
- Inspect for Issues: Keep an eye out for any signs of wear and tear. Addressing small issues early can save you from larger headaches down the road.
- Protect Your Investment: Use coasters, placemats, and area rugs to protect surfaces from scratches and stains. Think of them as the bodyguards of your beautiful new space.
Creating a Maintenance Schedule
A little planning goes a long way! Here’s how to create a maintenance schedule that fits your lifestyle:
- Monthly Check-ins: Set aside time each month to check on major systems like HVAC, plumbing, and electrical. It’s like a wellness check for your home!
- Seasonal Deep Cleans: Schedule deep cleaning sessions every season. A spring cleaning? Yes! A fall refresh? Absolutely!
- An Annual Review: Once a year, take stock of everything from paint touch-ups to landscaping needs to keep everything in tip-top shape.
Evaluating the Success of Your Renovation
Your remodel is complete, but how do you know it was worth it? Here are some signs that your renovation was a success:
- Satisfaction Level: Are you still swooning over your new kitchen or bathroom? If yes, that’s a win!
- Increased Functionality: Does the new layout make life easier? If you’re no longer tripping over furniture or feeling cramped, pat yourself on the back!
- Additions to Property Value: Consult with real estate experts about how much value your renovations have added. A well-planned remodel can significantly boost resale value.
<
li>Tips for upkeep after a major home remodel project
li >Creating a maintenance schedule
li >Evaluating the success of your renovation
Conclusion- Recap of the benefits of full-scale remodeling projects
- Encouragement to consider a complete remodel services for your home
- Final thoughts on embarking on a holistic house redesign journey
< / section >
-
< / section >
How to Choose the Perfect Home Addition Contractor: Expert Tips
Introduction
So, you’ve decided it’s time to expand your humble abode. Whether you’re dreaming of a cozy nook for your morning coffee or a spacious family room for movie marathons, home addition contractors are your go-to heroes in this quest! But hold on-before you start throwing around terms like “room addition builders” and “house expansion specialists,” let’s take a moment to dive into the nitty-gritty of choosing the right contractor for your project.
Choosing the best home addition company can feel like searching for a needle in a haystack. With so many local home addition companies out there, how do you know who’s worth their weight in drywall? Fear not! We’re here to equip you with expert tips that will make this decision less daunting and more exciting-like picking toppings for your pizza, but without the heartburn later!
First things first: it’s essential to understand the landscape of home renovation experts. Not all contractors are created equal. Some specialize in custom home additions, while others might focus on residential remodeling services. Knowing what each contractor brings to the table is crucial in making an informed choice.
Did you know? The average cost of a home addition in the United States ranges from $22,500 to $74,000. So choosing wisely can save you a lot of dough!
In this blog post, we’ll walk you through everything from understanding what makes a qualified contractor to key factors that will help you pick the perfect fit. We’ll even cover common misconceptions that could lead you astray-like assuming all contractors are equally skilled at building those Pinterest-worthy custom room additions.
Your dream space is just around the corner; let’s make sure it’s built by someone who knows what they’re doing! Ready? Let’s dive into the world of home improvement contractors, and get one step closer to turning your house into the home of your dreams.

Understanding Home Addition Contractors
Definition of home addition contractors
Home addition contractors are the skilled professionals who specialize in expanding your living space. They transform your dreams of a larger home into reality, whether it’s adding a brand-new room or extending existing ones. Think of them as the architects of your home’s growth, equipped with the know-how to navigate everything from design to construction.
Importance of hiring a qualified contractor
When it comes to residential construction services, hiring a qualified contractor is like having a good GPS for a road trip-it keeps you on track and helps avoid detours that could lead to disaster. A qualified contractor not only ensures that your project complies with local building codes but also brings valuable experience and expertise to the table.
Consider this: an experienced contractor has likely dealt with various challenges during home renovations, from unexpected plumbing issues to tricky zoning laws. They can anticipate problems before they arise and offer efficient home remodeling solutions. In contrast, an inexperienced contractor might leave you with a half-finished project and a lot of headaches!
Types of home addition projects
The world of home additions is as diverse as ice cream flavors! Here are some popular types of projects that house addition experts can help you with:
- Room Additions: Need an extra bedroom or office? Room additions can seamlessly integrate into your existing layout.
- Second Stories: If you’re short on land but rich in vertical space, adding a second story can give you all the room you need without sacrificing yard space.
- Bump-Outs: These are small extensions that can add precious square footage without the need for extensive renovations.
- Sunrooms: Want to bask in natural light without going outside? Sunrooms are perfect for enjoying nature while staying cozy indoors.
- Garage Conversions: Transforming your garage into living space is an excellent way to maximize utility while enhancing property value.
No matter what type of project you’re considering, it’s crucial to work with licensed building contractors for homes. They ensure quality craftsmanship and adherence to regulations, so you won’t have any nasty surprises down the line!
Pro Tip: Before starting any project, check if local construction firms for homes have experience with the specific type of addition you’re considering. This will save you time and stress!
Your journey toward creating that perfect space starts here! Understanding who home addition contractors are and what they do is essential for making informed decisions. Next up, we’ll explore key factors to consider when choosing the right contractor-because not all heroes wear capes; some carry tool belts!
Key Factors to Consider When Choosing a Contractor
Experience and expertise in home additions
When it comes to home addition contractors, experience is your best friend. You wouldn’t trust a rookie to perform surgery, right? Similarly, hiring a contractor with a solid track record in residential construction services is crucial. Look for contractors who have completed numerous successful projects, especially those that resemble what you envision for your home.
A contractor who specializes in custom room additions will likely have the expertise to handle unique challenges that arise during the construction process. For instance, if you want an open-concept space, they should understand how to remove load-bearing walls safely without turning your house into a game of Jenga.
Licensing and insurance requirements
Before you sign on the dotted line, ensure that your potential contractor has all the necessary licenses and insurance. Think of this as checking if your pilot has their flying hours logged before taking off! A licensed contractor adheres to local regulations and building codes, which means fewer headaches down the line.
Additionally, ask about their insurance coverage. If something goes awry-like a misplaced hammer leading to an unexpected hole in your roof-you want to be sure you’re not left holding the bag. A reliable contractor should have liability insurance and worker’s compensation coverage for their team.
Portfolio of past projects
A picture is worth a thousand words-especially when it comes to evaluating potential home improvement contractors. Request a portfolio showcasing their past work. This will give you insight into their style and craftsmanship.
Pay attention to projects similar in scope or style to what you want. If you’re looking for house expansion specialists who can create seamless transitions between old and new spaces, make sure they’ve done it successfully before!
Quick Tip: Don’t hesitate to ask for references from previous clients! Hearing about others’ experiences can provide valuable insight into how well the contractor communicates and delivers on promises.
Client testimonials and reviews
In this digital age, online reviews are like gold nuggets buried in the vast landscape of home renovation experts. Check platforms like Google Reviews or Yelp for feedback on potential contractors. Look for patterns-if multiple clients rave about a contractor’s punctuality or craftsmanship, that’s a good sign!
However, take individual reviews with a grain of salt; some may be overly positive or negative due to personal biases. Instead, focus on overall trends in feedback. A few complaints might be normal but frequent issues with communication or quality should raise red flags.
The Better Business Bureau states that 70% of consumers trust online reviews as much as personal recommendations.
Your goal here is simple: find top-rated home builders who not only talk the talk but also walk the walk!
Selecting the right contractor isn’t just about finding someone with tools; it’s about partnering with skilled professionals who can bring your vision to life while ensuring quality and compliance every step of the way. So keep these key factors in mind as you embark on your journey toward home expansion!
If you’re ready to take the next step toward transforming your space, start reaching out to potential candidates today! Your dream addition awaits!
The Interview Process: Questions to Ask Potential Contractors
So, you’ve narrowed down your list of home addition contractors and are ready to dive into the interview process. This is where the magic happens! Think of it as a first date; you want to ensure there’s chemistry, compatibility, and a shared vision for your home expansion. So grab your notepad and let’s break down some essential questions you should ask potential contractors.
Project timeline and availability
First things first: when can they start? Understanding the contractor’s availability will help you set realistic expectations for your project timeline. Ask questions like:
- When can you begin my project? This helps gauge their current workload.
- What is your estimated completion time? Get an idea of how long the work will take.
- How do you handle delays or setbacks? Because let’s be real, sometimes life throws curveballs!
A good contractor will provide a clear timeline and have a plan in place for unforeseen hiccups. Remember, communication is key in keeping your project on track!
Budgeting and cost estimates
No one wants to get blindsided by costs that spiral out of control faster than a toddler on a sugar rush! To avoid sticker shock at the end of your home addition journey, ask:
- Can you provide a detailed estimate? This should include labor, materials, permits, and any other possible expenses.
- How do you handle changes or additional costs during the project? It’s crucial to know how flexible they are with budgeting.
- Aren’t there any hidden fees I should be aware of? A reliable contractor will be transparent about all costs involved.
This way, you’ll have a clear understanding of what you’re getting into financially. Remember: knowledge is power when it comes to budgeting for custom home additions.
Subcontractors and team members involved
The best house expansion specialists don’t work alone; they often have a skilled team backing them up. It’s important to know who will be working on your home addition project. Ask these questions:
- Who will be on-site during construction?
- Do you use subcontractors? If so, how do you vet them?
- Will I have a dedicated project manager overseeing everything?
This helps ensure that you’re not just getting some random crew but rather a cohesive team that understands the vision for your space. After all, teamwork makes the dream work!
Communication style and project management approach
You want to work with someone who communicates clearly and regularly-nobody likes radio silence when it comes to their home! Here are some questions to gauge their communication style:
- How often will we check in during the project?
- What methods do you use for updates (calls, emails, texts)?
- If issues arise, how quickly can I expect a response from you?
A contractor who prioritizes communication can help alleviate stress throughout the renovation process. You want someone who treats your home like their own-because let’s face it; no one wants to feel like just another job on their list!
Your Takeaway: Asking these questions not only helps clarify expectations but also gives insight into how well you’ll work together throughout this exciting journey toward enhancing your space with home extension contractors.
The interview process is an excellent opportunity to find out if potential contractors are truly equipped to bring your vision to life while ensuring quality craftsmanship every step of the way. So go ahead-get those answers! Your dream addition is waiting just around the corner!

Evaluating Estimates and Contracts
Understanding detailed estimates vs. ballpark figures
When diving into the world of home addition contractors, you’ll encounter two types of estimates: detailed and ballpark figures. Think of a ballpark figure as a rough sketch, while a detailed estimate is like a full-color blueprint. One gives you a fuzzy idea of costs, while the other lays out every nail and beam.
A detailed estimate should break down costs for labor, materials, permits, and any other expenses, leaving no stone unturned. This level of detail not only helps you understand where your money is going but also allows for better budgeting and planning.
In contrast, a ballpark figure is like saying “I’ll need around $50,000” without specifying what’s included. Sure, it’s easier to digest, but it can lead to nasty surprises down the line when the final bill comes in higher than expected!
Quick Tip: Always ask for a detailed estimate before moving forward with any home improvement contractors. It’s your best defense against unexpected costs!
Key elements to look for in a contract
Once you’ve settled on your favorite contractor from the pool of local home addition companies, it’s time to talk contracts. A good contract is like a solid handshake; it sets clear expectations and establishes trust. Here are some key elements to look out for:
- Scope of Work: This should detail exactly what work will be performed. No guesswork allowed!
- Timeline: Look for start and completion dates to keep everyone accountable.
- Total Cost: Ensure the contract specifies the total price and includes payment schedules.
- Change Orders: Understand how changes will be handled if you decide to add that fancy skylight halfway through!
- Warranties: Ask about warranties on both labor and materials; this will protect you from future headaches.
A well-drafted contract can save you from misunderstandings later on. It’s your safety net in the circus act that is home renovation!
The importance of payment schedules and warranties
No one wants to feel like they’ve been pickpocketed after paying for their dream addition! That’s why establishing clear payment schedules with your house expansion specialists is crucial. A typical schedule might include an initial deposit followed by payments tied to specific project milestones.
This approach not only ensures that work progresses as planned but also keeps your contractor motivated-after all, no one wants to deliver a half-baked project when there’s money on the line!
The National Association of Home Builders recommends that homeowners avoid paying more than 10% upfront before work begins.
Additionally, warranties are essential in protecting your investment. A solid warranty covers both materials and workmanship-so if something goes awry after completion, you won’t be left holding the bag (or hammer) alone.
Your Takeaway: Make sure your contract includes clear payment schedules and robust warranties. These elements are vital in ensuring peace of mind throughout your renovation journey with professional home builders.

The Role of Energy Efficiency in Home Additions
Benefits of energy-efficient materials and designs
When it comes to home additions, energy efficiency is like the cherry on top of your renovation sundae. Not only does it help the planet, but it also keeps your wallet happy! Here are some sweet benefits:
- Lower Utility Bills: Energy-efficient materials can significantly reduce your heating and cooling costs. Imagine saving enough each month to treat yourself to that fancy coffee you love!
- Increased Comfort: Proper insulation and energy-efficient windows keep your home at a comfortable temperature year-round. No more fighting over the thermostat!
- Higher Property Value: Homes with energy-efficient upgrades tend to have better resale value. Future buyers will appreciate the savings they’ll enjoy.
- Environmental Impact: By using sustainable materials and designs, you’re doing your part in reducing carbon footprints. Go green, save green!
CERTIFICATIONS that contractors should have (e.g., LEED)
When evaluating home addition contractors, look for those who hold certifications in energy efficiency and sustainability. These badges of honor indicate that they are well-versed in eco-friendly practices. Some noteworthy certifications include:
- LEED (Leadership in Energy and Environmental Design): This globally recognized certification ensures that building practices meet rigorous environmental standards.
- BPI (Building Performance Institute): BPI-certified contractors focus on improving energy efficiency through comprehensive assessments.
- NABERS (National Australian Built Environment Rating System): This system rates the environmental performance of buildings, ensuring they meet high sustainability standards.
A contractor with these certifications is likely to be knowledgeable about the latest energy-efficient technologies and methods, giving you peace of mind as you embark on your custom building extensions.
Sustainable practices in home additions
Sustainability isn’t just a buzzword; it’s a way of life for many home improvement contractors. When discussing your project with potential house expansion specialists, consider asking about their sustainable practices:
- Recycled Materials: Using reclaimed wood or recycled metal can add character to your new space while reducing waste.
- Energizing Your Space: Incorporating solar panels or energy-efficient lighting can drastically cut down on electricity use.
- Sustainable Landscaping: If you’re expanding outdoors, consider xeriscaping or native plants that require less water.
- Sourcing Locally: Working with local suppliers reduces transportation emissions and supports community businesses.
Your Takeaway: Choosing a contractor who prioritizes energy efficiency not only enhances your living space but also contributes positively to the environment. So, make sure to ask about their sustainable practices when interviewing potential general contractors for additions.
The role of energy efficiency in home additions cannot be overstated. From saving money on bills to increasing comfort levels, investing in an eco-friendly approach will pay off long after construction is complete. Ready to start planning your dream addition? Reach out to qualified local remodeling experts today!

The Importance of Design Compatibility with Your Existing Home
Aesthetic considerations for seamless integration
When adding a new room or expanding your space, the last thing you want is for your home addition to look like a patchwork quilt. You know, that time when your mom tried to make a sweater out of mismatched yarn? Yeah, let’s avoid that! Home addition contractors play a crucial role in ensuring that your new space harmonizes with the existing architecture.
To achieve seamless integration, consider the following aesthetic factors:
- Color Palette: Choose exterior colors that complement your existing home. A fresh coat of paint can do wonders, but going too bold might make your new addition stand out like a sore thumb.
- Materials: Use similar materials for siding and roofing. If your house has brick on one side and vinyl on the other, you might want to stick with one or the other to maintain consistency.
- Windows and Doors: Match window styles and door designs. If you have classic double-hung windows, opting for modern sliders might create an awkward visual disconnect.
- Landscaping: Integrate landscaping elements around the new addition to tie it into the overall yard design. Think of it as accessorizing an outfit; the right plants can elevate the whole look!
A well-designed addition should feel like a natural extension of your home rather than an afterthought. So when you’re chatting with potential home improvement contractors, ask how they plan to achieve this design harmony!
The role of architectural style in additions
Your home’s architectural style is its personality; it tells a story about its history and character. When planning an expansion, think about how this new chapter will fit into that narrative. Just like casting choices in movies can make or break a film, choosing the right architectural style for your addition can greatly impact how cohesive everything feels.
Here are some key points to consider:
- Mimicking Existing Features: If you live in a Craftsman-style home, consider incorporating exposed beams and built-in furniture into your new space.
- Simplifying Complexity: Avoid overly ornate designs if your existing structure is more minimalist. The goal is balance; you don’t want one part of your house shouting while another whispers!
- Sizing Matters: Make sure that the scale of your addition complements existing structures. A massive second story on a small bungalow could create an imbalance that feels off-kilter.
- Consulting Professionals: Engage with house renovation specialists. They understand architectural nuances and can guide you through making choices that enhance rather than detract from your home’s character.
Your Takeaway: Designing an addition isn’t just about adding square footage; it’s about enhancing what’s already there! Collaborate closely with experienced local remodeling experts who understand how to maintain design compatibility throughout the project.
The importance of design compatibility cannot be overstated-it ensures that every corner of your home feels connected and thoughtfully curated. So before breaking ground on those exciting plans, take time to discuss aesthetics and architectural styles with potential home extension contractors. Your future self will thank you when everything comes together beautifully!
Conclusion: Making the Right Choice for Your Home Addition Project
So, here we are at the finish line of your journey to find the perfect home addition contractors. Choosing a contractor for your home addition project is not just about picking someone with a tool belt and a pickup truck; it’s about finding a partner who understands your vision, respects your budget, and delivers quality craftsmanship.
As you wrap up this crucial decision-making process, keep these key insights in mind:
- Do Your Homework: Research potential local home addition companies thoroughly. Look for reviews, check references, and dive into their portfolios. Think of it as dating-you wouldn’t settle down without knowing your partner well!
- Ask the Right Questions: During interviews, don’t shy away from asking about their experience with specific types of projects. Are they familiar with energy-efficient designs or custom room additions? Their answers can reveal whether they’re the right fit for your unique needs.
- Stay Within Budget: Be upfront about your budget constraints and ensure that all estimates are detailed. Remember, a good contractor will provide clarity rather than vague ballpark figures that leave you scratching your head.
- Trust Your Instincts: After all interviews and evaluations are complete, trust your gut feeling. If something feels off during conversations or if you sense a lack of communication skills, it might be best to keep looking!
Your home is not just a structure; it’s where memories are made and dreams come to life. By selecting the right house expansion specialists, you’re investing in more than just additional square footage-you’re enhancing your lifestyle.
Your Next Steps: Start reaching out to potential contractors today! Schedule those interviews and ask those burning questions. The sooner you connect with skilled professionals, the closer you’ll be to realizing your dream space!